
|
Contents Member Sign in |
Installing, Step-by-StepThe following instructions will walk you through the process of setting up, testing, and configuring Sermons Online with your church web site. It is presumed that you have already downloaded and installed the Sermon Publisher and are ready to begin using it for the first time. If you need help with any of these steps, just sign in to the Site Manager and open a Support Ticket 1. Start the Sermon PublisherStart the Sermon Publisher by clicking on its Desktop Icon. Review the one-time setup configuration tasks to be done, and click Next. The online help link on this screen displays this help page. 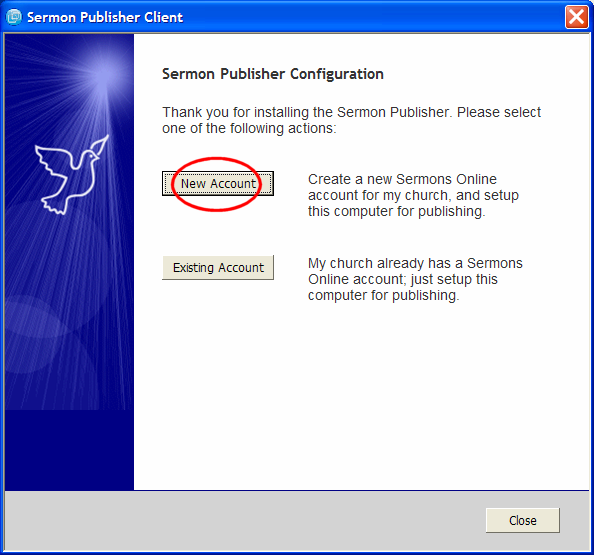 2. Enter your Sermon Site Basic InformationEnter the basic settings for your sermon hosting account. The red dots to the left of the text entry fields indicate required entries. 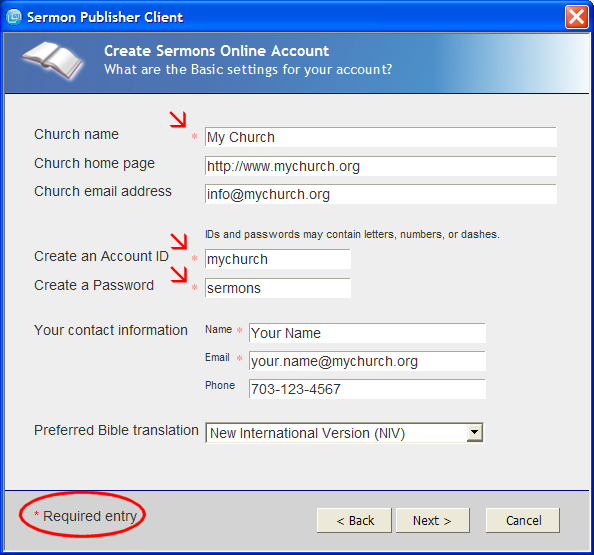 3. Select Default Multimedia SourceThe Publisher can capture, encode, and upload multimedia files. This page lets you set the default source of your sermon multimedia, and what kinds of streaming media files you want to publish. 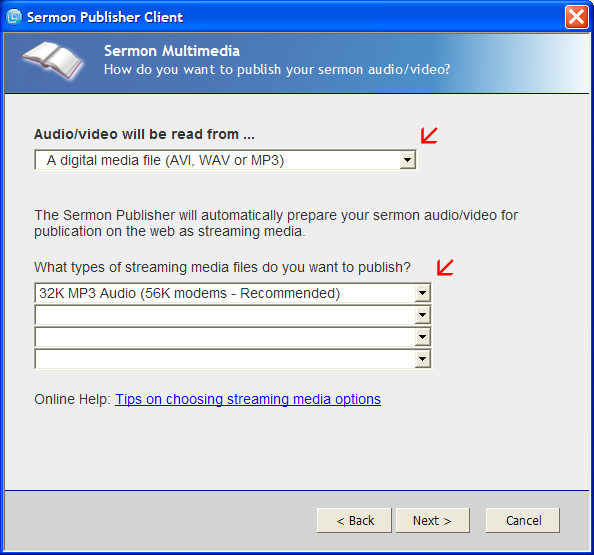 4. Install Audio/Video Helper ApplicationsThe Publisher uses several helper applications to create audio/video files. These applications are all free, but they must be installed separately. This page lists which applications are needed. If the Status for any application shows an Install button, as below, click it to install it from the web: 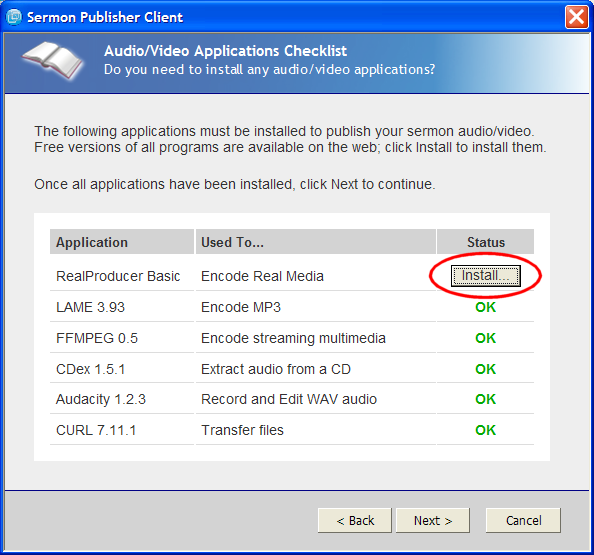 5. Example: Installing A Helper ApplicationBelow is an example of a helper application being installed (Windows Media Encoder 8). You must install all required helper applications before continuing with creating your new Sermons Online site. 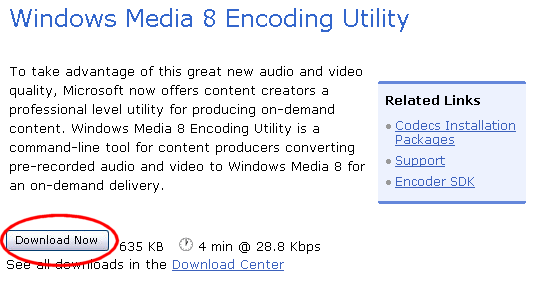
Once you've installed the helper application(s), click on the Next button on the Sermon Publisher. If the application is properly installed, you will see the "Install" button replaced with "OK". 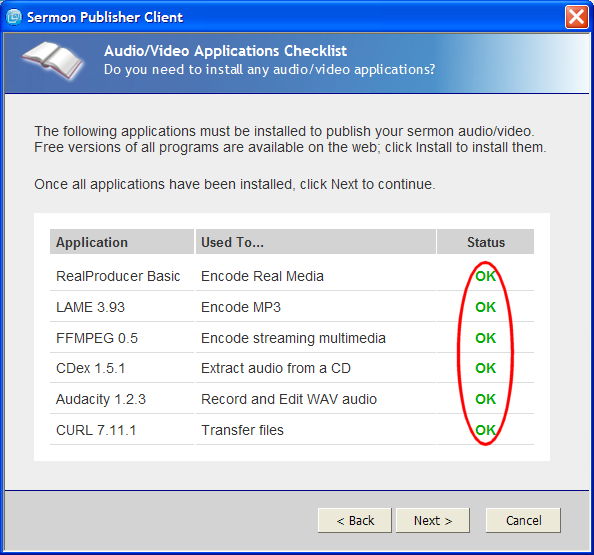 6. Review Sermon Site Integration StepsYour webmaster will need to create a web page on your church site to refer to your sermons, then log on your Sermons Online account to integrate it with your Sermon Site. 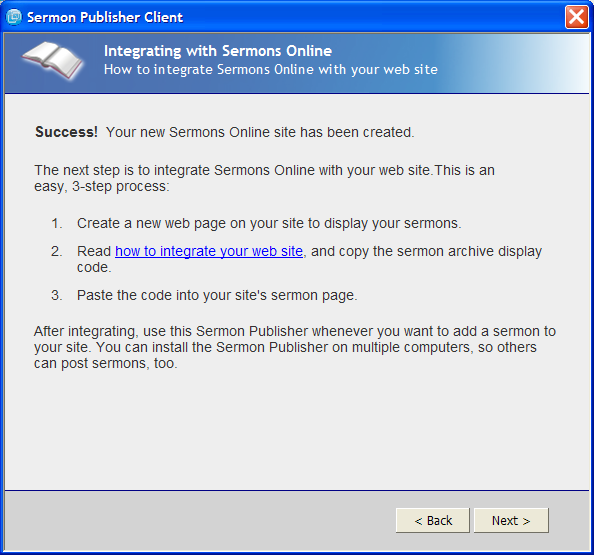 7. Test the Sermon PublisherCongratulations! Your new Sermon Site has been created and all one-time configuration tasks have been done. You're ready to begin publishing sermons. This is the starting page of the Publisher. It contains some links to the Sermon Site Manager web page, and a button to add sermons. To test the Sermon Publisher, we're going to publish a short audio file. Click the Add Sermon button: 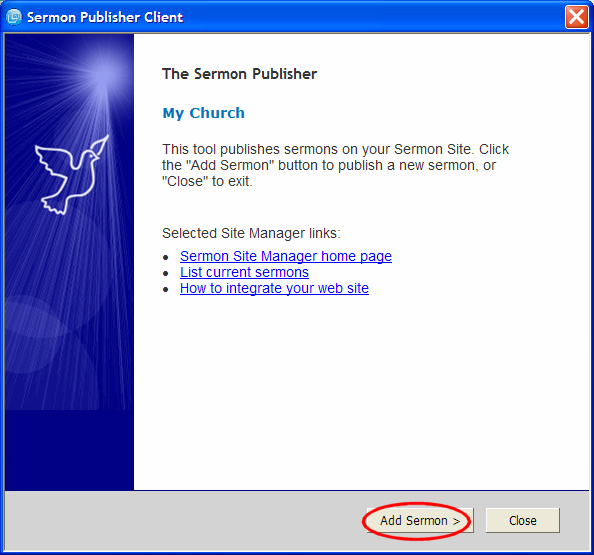 Enter a Title, Author, and Date. Click the "Add New" link to add a new name to the list of speakers. 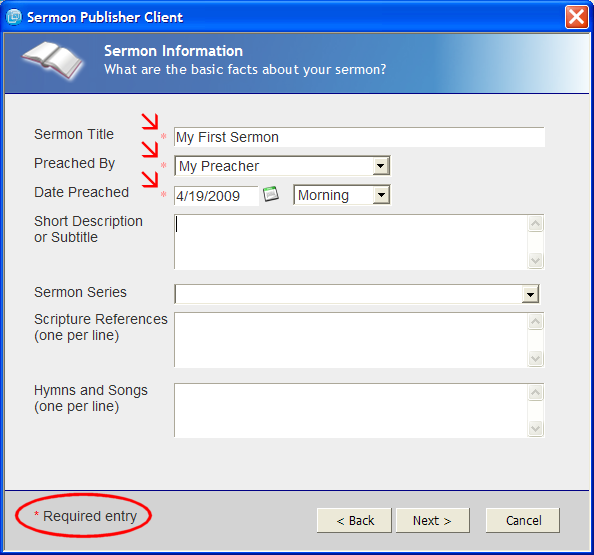 Click through the Sermon Notes screen to the Sermon Multimedia screen. This is where you will specify the source of your sermon audio/video. For this test, click the Browse button: 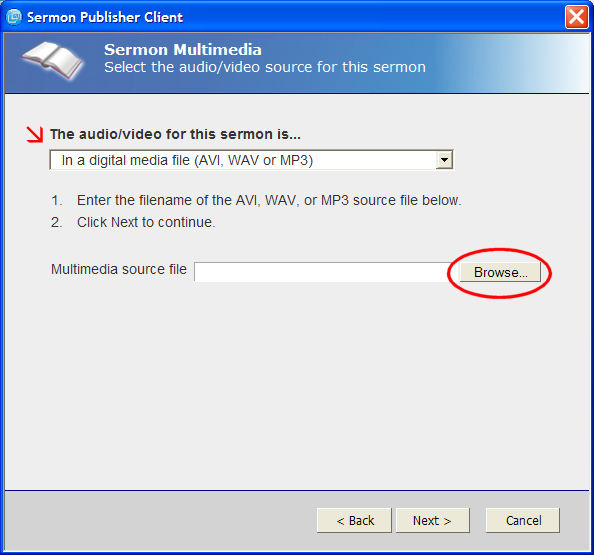 Browse through your folders, and find the "..\Sermon Publisher\media" folder. This folder will be on Local Disk (C:), if you used the default installation choices. 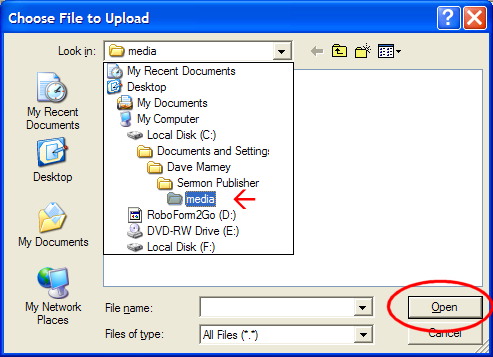 Select the "test.wav" file and click the Open button. 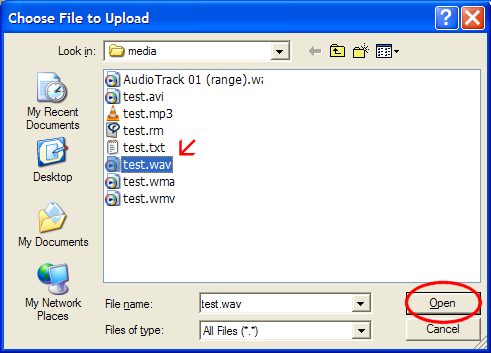 Once you've selected the test.wav file, click the Next button to start the publication process. The Publisher will cycle back to the first page, and display a progress report 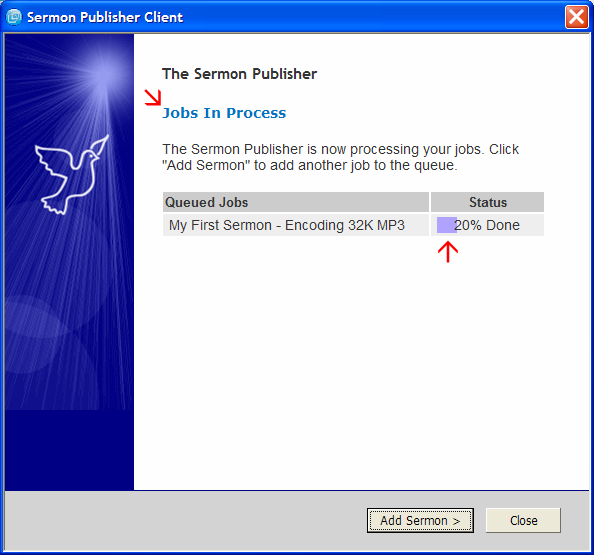 If you had more than one sermon to add, you could click the Add Sermon button again to add it while the first sermon was being processed. You do not need to wait for one sermon to be published before beginning another. If the sermon is sucessfully published, the progress report will briefly show "100% Complete", then the sermon will be removed from the Job Queue list. If there is an error, the sermon will remain in the Job Queue with a link to a diagnostic report. 8. Editing Your SermonOnce you've published your sermon, use the Sermon Site Manager page to edit it. Click the link, "List current sermons" from the Publisher home page. 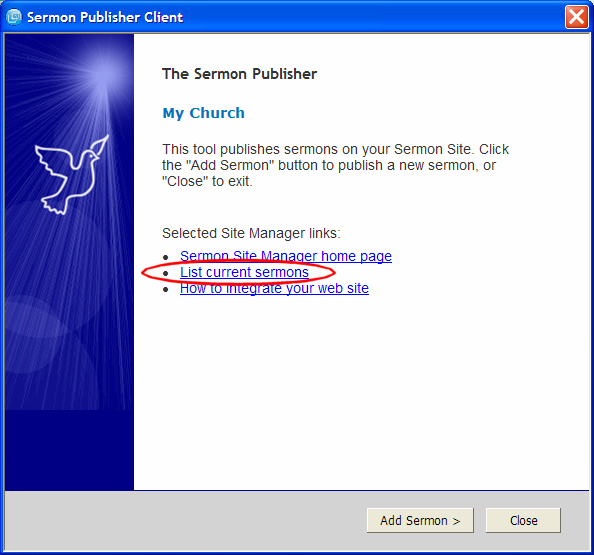 This opens a new browser window that displays a list of the current sermons in your archive. To edit a sermon, click the "edit" link. 
9. Integrate Your Sermon Web SiteOnce we've completed the test sermon, we're ready to integrate your new Sermons Online site with your church web site. Integration is performed via copying and pasting HTML from Sermons Online to your church site. (If you are using a templated web service such as Netministry, Christianity.com, E-Zekiel, MyChurchWeb, etc., see these tips for help on editing in HTML mode.) To get a copy of your Sermon Page HTML, click on the "Integrate your web site" link from the front page of the Publisher: 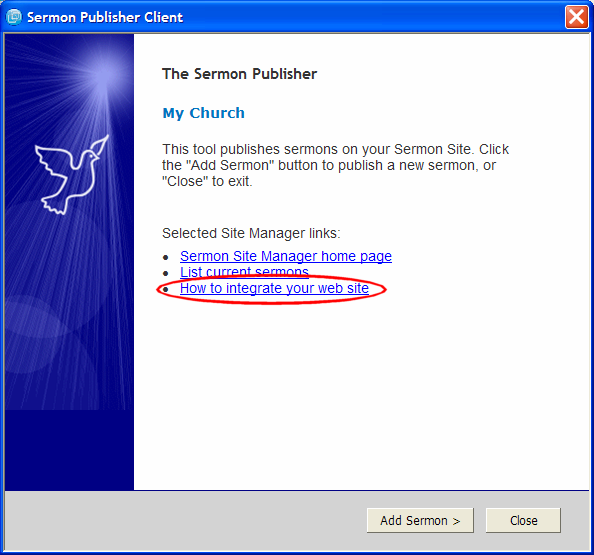
The HTML is in the text editing box. This is what you will copy and paste into the sermon page on your church web site: 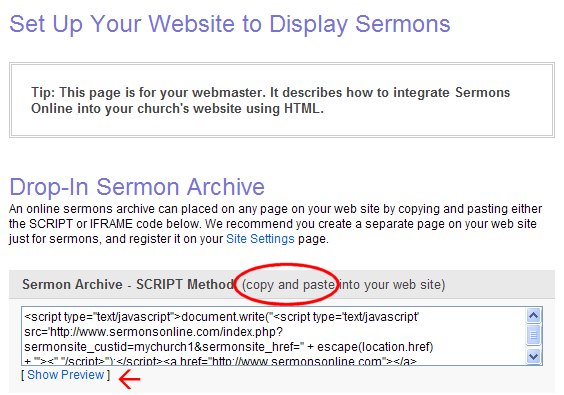
10. Congratulations!Your Sermon Online Site is now integrated with your church web site. To display your sermons, browse to your church's sermon page. Once you've integrated Sermons Online, you never need update it again. Whenever you add a sermon with the Publisher, or edit a sermon with the Site Manager, the change will be instantly reflected on your web site. |